출처 : http://www.ayatoweb.com/ae_tips_e/ae52_e.html
그냥 개인적으로 인쇄해서 보려고, 짜집기 한겁니다. ^-^;;
아야토 웹에서 인쇄하면 배경이 까만 색이고.. 필터 세팅이나 타임라인은 클릭해서 봐야하는 등..
인쇄용이 아니라서요.. 그냥 인쇄용으로 만든겁니다.
아무 의미 없음.. ^-^;;
|
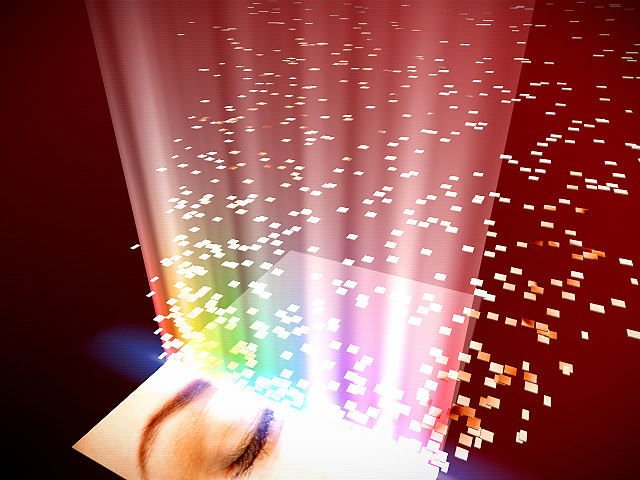
Example.52: | Particle PhotoPrint (AE6.0 & Trapcode Starglow) |
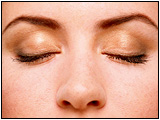 |
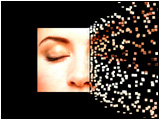
At First The effect is expressed by reversely reproducing the Shatter effect. First, Prepare Photo Footage. 640x480 pixel (CompName : AE52-1_Face) |
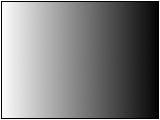 |
Gradation for Shatter Effect Create NewComposition and NewSolid. (CompName : AE52-2_GradforShatter) Apply Effect > Render > Ramp . Adjust to Parameter. |
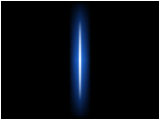 |
Flare Material Create Light Flare Footage. (CompName : AE52-3_Flare) |
|
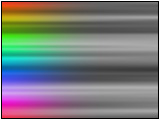
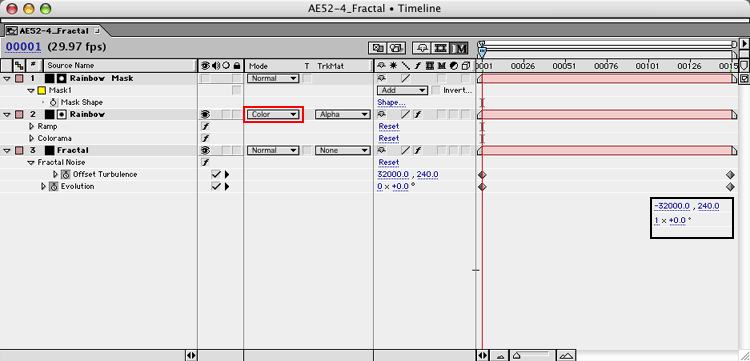
Fractal Noise Animation Create NewComposition and NewSolid. (CompName : AE52-4_Fractal) Apply Effect > Noise > Fractal Noise. Adjust to Parameter. Add Rainbow Color Area. Use Effect > Render > Ramp Use Effect > Image Control > Colorama Please adjust the mask.
View Effect Controls Window "Fractal Noise" etc 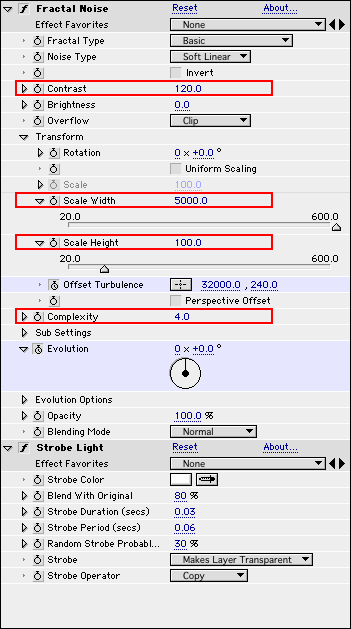 |
|
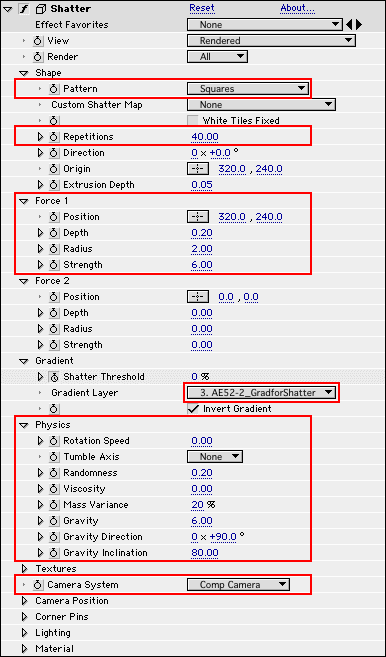
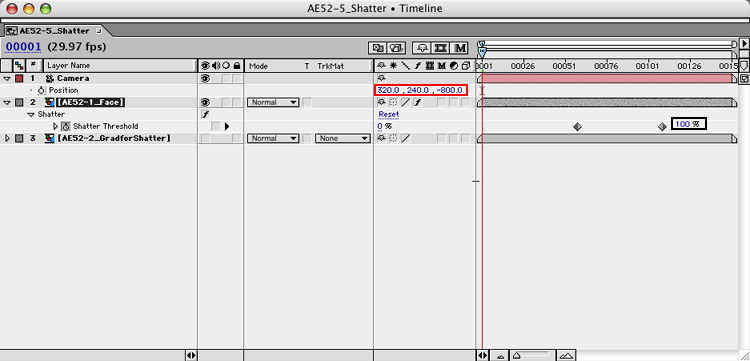
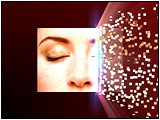
Shatter Effect Put the Material STEP1-2 into a New Composition. (CompName : AE52-5_Shatter) Create New Camera. (24mm) Select STEP1 Comp Layer. Apply Effect > Simulation > Shatter. Adjust to Parameter.
|
|
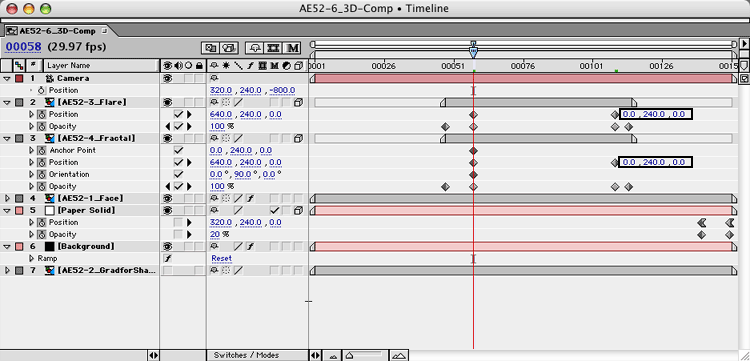
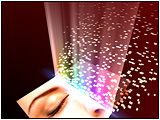
3D Composite Put the Material STEP3-4 into STEP5 Comp. Move it according to the Shatter effect.
|
|
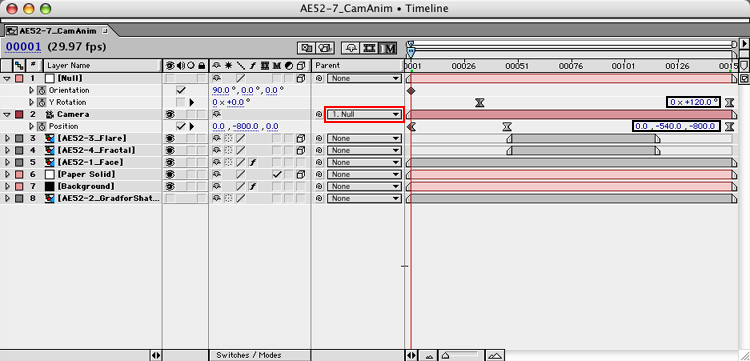
Camera Animation Create Null Object in STEP6 Comp. Adjust Camera and Null Parameter.
|
|
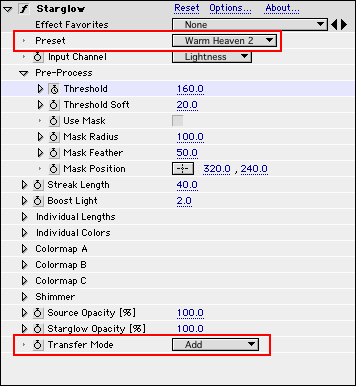
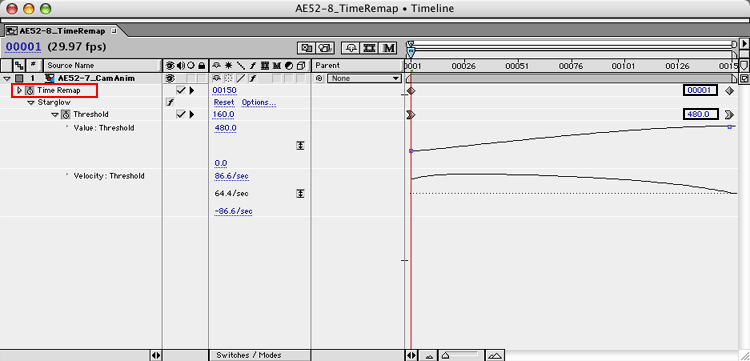
TimeRemap and Finish Put the Material STEP7 into a New Composition. (CompName : AE52-8_TimeRemap) Apply Time Remap and Starglow Effect. Layer Menu > Enable Time Remapping. Adjust to Parameter. If you don't like this result, You should return STEP5-7 and adjust it.
|
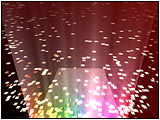
"Trapcode Starglow"
View Timeline Window
View Large Picture
640x480
The detail information about "Trapcode Starglow"
Trapcode http://www.trapcode.com/
